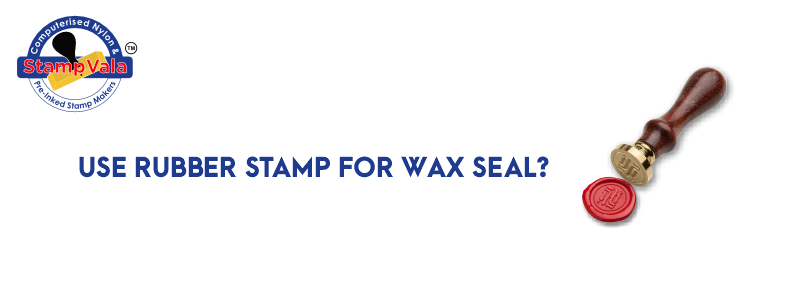
You’ve seen them in movies and on TV—wax seals used by the wealthy and powerful to close an envelope with a flourish and make a statement. But you don’t need to be rich or famous to add some drama to your mail. A wax seal stamp can create an impression that says “important” and “official.”
What Is a Wax Seal Stamp?
A wax seal stamp is a tool used to create an impression of a design or emblem in wax. It can be made from various materials, such as metal, wood, or plastic, and is often used as authentication or decoration.
The design is placed in the stamp’s center, and melted wax is poured over it. The stamp is then pressed onto the paper or object to be sealed, leaving an impression of the design in the wax.
Benefits of Custom Wax Seals
There are many benefits to using a custom wax seal stamp. For one, it adds a personal touch to any letter or package you send. It also reinforces the importance of the message you’re sending, giving it an air of formality and legitimacy.
But the best benefit of all is that it helps build trust. When your recipient sees that you’ve taken the time and care to use a wax seal stamp, they know you’re serious about whatever it is you’re sending them. They’ll be more likely to take the time to read it and consider your message seriously.
How to Choose the Right Wax Seal Stamp
Now that you know the basics about wax seals, it’s time to choose the proper stamp for your needs. Here are some factors to consider:
First, think about what type of wax you plan to use. Sealing wax is available in various colors and finishes to match the stamp to your branding or personal style.
Next, consider the size and shape of the seal. Some stamps are circular, while others are more elongated. You’ll also choose a size appropriate for your needs; a larger stamp is better for sealing envelopes, while a smaller stamp is perfect for invitations or announcements.
Finally, consider the design of the stamp. There are a variety of designs to choose from, including symbols, initials, and ornate designs. You can also create your design or create a custom stamp specifically for your needs.
Step-by-Step Guide to Apply a Wax Seal
Now that you’ve selected a wax seal stamp, it’s time to apply it properly and have your letter, package, or greeting card looking extra special.
First, pick a suitable wax that won’t damage the paper below. Special sealing wax sticks are made from paraffin and beeswax and are available in various colors; look for one that will match your project. Now you can heat the wax: use a spoon over a candle or lighter to melt it, then carefully pour it onto the paper where you want your stamp to go.
Now, press your stamp firmly into the still-hot melted wax for about 20 seconds before releasing it. Be careful not to touch the hot metal parts with bare skin – this can cause burns. If imperfections are in your logo, immediately dab away any excess with a wet paper towel. You can also use an extra-fine brush or stick to add details such as raised writings or symbols while still warm if desired.
Done? Cool! Now, wait until the wax dries entirely before handling your masterpiece – this should take around 5 minutes of cooling time before you can show off your skills with pride!
Conclusion
When it comes to using a wax seal stamp, there are a few things you need to keep in mind. Here’s a step-by-step guide to getting started:
1. Choose the proper wax seal stamp for your needs. There are various stamps to choose from, so make sure you select one best suited for your needs.
2. Melt the wax. You will need to melt the wax to use it. There are various ways to do this, so choose the method that is best for you.
3. Place the wax on the stamp. Use a spoon or your fingers to place the wax on the stamp.
4. Stamp the wax. Stamp the wax onto the envelope or paper.
5. Wait for the wax to dry. Once the wax has been stamped, you will need to wait for it to dry before sending the letter.
